
1. Sign into Google Webmaster Tools with your Google Account.
2. On the Dashboard, type the site URL in the Add site field. Make sure you type the entire URL, such as http://www.example.com/ and then click Add Site.

3. Click on Verify your site link.
4. Select Add a meta tag as the verification method.
5. Copy the meta tag
6. Open the Edit HTML mode from the blogger’s Layout Editor. Paste the meta tag you just copied immediately under the tag "head". Save the template and go back to Google Webmaster Tools.
7. Click on the Verify button.
8. Go back to dashboard in Google Webmaster Tools and check whether the verification step is completed. It might take a few minutes to get your status updated.
How to Add and verify your Blogger blog on Yahoo:
1. Sign into Yahoo Site Explorer with your Yahoo Account.
2. From the Site Explorer click My Sites.
3. Type the site URL in the Add My Site Field. Make sure you type the entire URL, such as http://www.example.com/ and then click Add My Site.

4. Click on the yellow button under the Status
5. From the Authentication page select “by adding a META TAG to my home page" Copy the whole tag.
6. Open the Edit HTML mode from the blogger’s Layout Editor. Paste the Meta Tag you just copied immediately under the tag "head". Save the template.
7. Go back to Yahoo Site Explorer and click on the "Ready to Authenticate" button. (It might take a few hours to get your status updated)

How to Add and verify your Blogger blog on MSN:
1. Sign into Windows Live with your Windows Live ID (Hotmail ID).
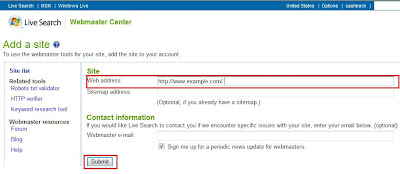
2. On the Webmaster Center, type the site URL in the Web address field. Make sure you type the entire URL, such as http://www.example.com/
3. Click Submit.
4. From the Authenticate Ownership of Website page select “Meta tag authentication" Copy the whole tag.
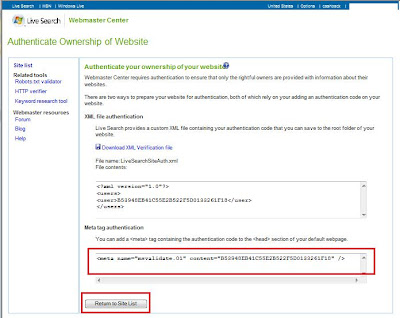
5. Open the Edit HTML mode from the blogger’s Layout Editor. Paste the Meta Tag you just copied immediately under the tag "head". Save the template.

6. Go back to Authenticate Ownership of Website page and click on the "Return to Site List" button.
7. From the Site List page click your web address to check whether the verification step is completed.


How to add Sitemap to Google Yahoo and MSN
Increase your link popularity: submit your site to RSS Feed directories / Dofollow Social,& Link Building sites
How to add Meta Tags to Each of your blogger post


 ShareThis


great post, just one thing, there should be a forward slash added "/> to close the yahoo meta tag
Thank you very much for this post. Above comment is true. The new Google templates require that you close the XHTML tags and not all sites generate these meta tags in XHTML format.
Great instructions! With Google I did exactly what you said and I can NOT get the text to parse. If I move it I can but I can't get verified no matter what. Any tips? dnaetc@gmail.com
Got it to work. I had to add a slash at the end of the language google gave me. /> Strange that they wouldn't include that closure.
Really it is a great post that explains each and every thing about verifying a blog. I'm new to blogging and find your post very detailed.
Thanks
i'm newbie.... really helpful with ur post.. thanks!
You have provided a great article specially for the seo point of view. Very detailed and nicely written article. Thanks...